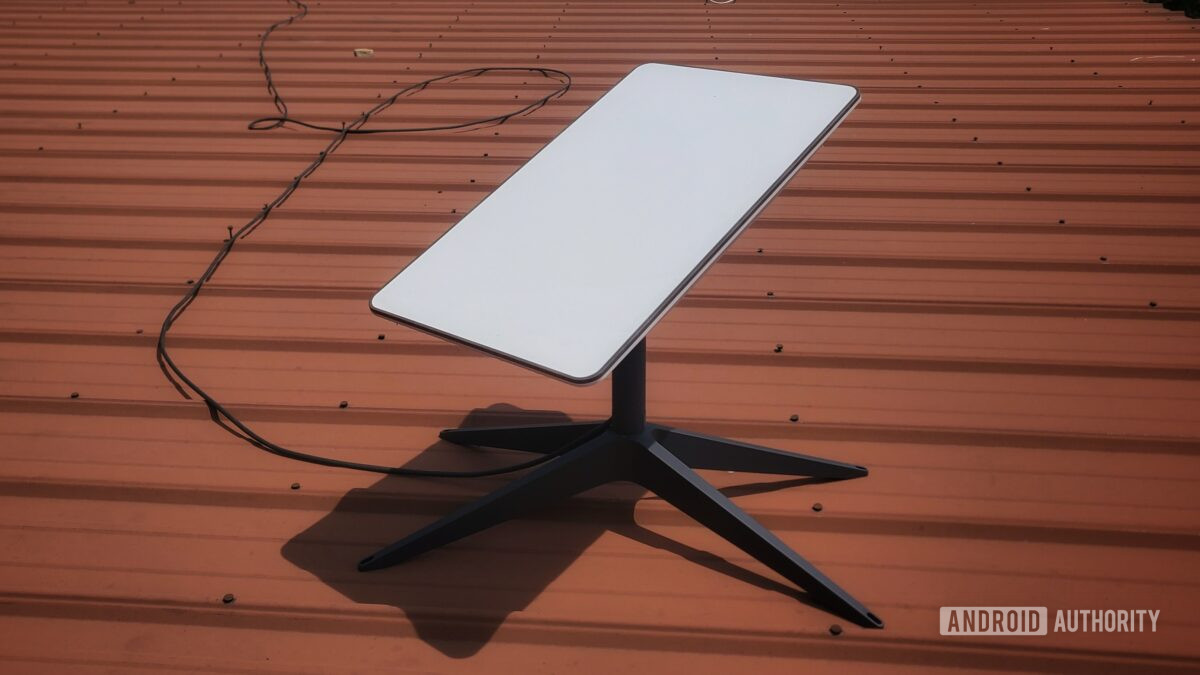
Starlink is a significant game changer for those who live in areas with limited or no high-speed internet options and is easily the best Satellite Internet provider. Of course, it’s a relatively new technology and it relies on communicating with mini-satellites far off in space. As you can imagine, things are bound to go wrong from time to time. In this guide, we take a closer look at Starlink problems and how to fix them.
Problem 1: Starlink Offline: Complete loss of Starlink signal

Is Starlink not working at all? If that’s the case there are quite a few things that could be responsible. Here are just a few of the more common reasons:
Is Starlink down?
Earlier this month there was a major outage that lasted hours. At the time I had no clue that it was a complete shutdown in my area and I spent a good twenty minutes troubleshooting the most likely causes. Before you jump through a bunch of hoops you might want to visit the unofficial Starlink Status site or Down Detector.
Are your router and dish properly connected?
Recently I had an issue where I couldn’t get a signal at all and it looked like my dish wasn’t responding. As it turned out, my dish’s cable had become slightly unseated even though it didn’t look like it at a glance. We’d had heavy winds and so the only thing I can think of is this somehow caused enough movement for the cord to wiggle loose.
In other words, check your cable connections! Unplug and replug both the dish’s base and your router. If things start working again after that you’ll know this was the problem.
Weather could be the problem
While Starlink is less sensitive to weather than traditional satellite services, it’s not entirely weatherproof. Heavy rain can disrupt the signal, although it usually handles mist or light rain well. Snowy weather may also cause problems. Although the Starlink dish has a built-in heater, it may struggle with extremely cold temperatures, allowing snow to accumulate and interfere with the signal.
If it’s snowing and you can physically reach your dishy, gently removing the snow with a broom may temporarily restore the signal. Unfortunately for heavy rains, the only thing you can really do is wait it out.
To minimize disruptions, it’s a good idea for satellite users to have a backup plan, such as a hotspot. You can also use your existing mobile data plan if it allows you to use the connection as a temporary hotspot. While mobile signals can also degrade in extreme weather, it’s typically not as severe.
The position of your Starlink dish could be the issue
If you live in an area with many obstructions, such as heavily wooded regions, you might experience frequent signal loss. To check for obstructions you’ll want to hop into the official Starlink app.
Once you log in, go to Obstructions and you’ll be presented with a 3D representation of your dishy’s view of the sky. Anything blue is clear, red bits represent obstructions. You can also check manually for obstructions by clicking the Check for Obstructions button. This will use your phone’s camera. You’ll basically point and move it around the sky and Starlink will determine any potential issues.
The router or dish could just be having a temporary issue

Sometimes software glitches can be responsible for significant Stalink problems like a loss of signal. While it’s possible these issues could go away on their own, here are a few other things you can try:
- Ensure your software/firmware is on the correct version. Open the app and scroll to the bottom. Click on the Advanced tab. You’ll see information with your current software build for both the router and the dish. You can check to see if they match the currently available version by going to Starlink Insider. If they are out of date the software should automatically download the newest version eventually. Restarting your router should trigger the update right away.
- Restart your router. Even if your software is up to date, restarting your router and dish can sometimes solve weird quirks like this. Under Settings, you’ll see a Reboot Router toggle, slide it to restart. Do not manually unplug the cable when it’s powered on, as this could potentially cause damage.
- Restart your Starilnk Dish next. In the same Settings tab click on the Starlink tab at the top, you’ll now see a Slide to Reboot option. Use the slider and it’ll restart.
Didn’t work? Try using the Stow Starlink slider instead. While this is meant for stowing away your unit for shipping, it also will trigger a hard reset when you unstow it.
Check the bottom of your router, there might be communication issues
If the router’s light is red it is having trouble communicating with the dish. This issue could result from various problems, including hardware failure or a faulty cable. Unfortunately, for those with square dishes like mine, the router and dish are connected using a proprietary cable. If the cable is damaged due to reasons beyond your control, Starlink may send you a free replacement. However, if you need to purchase a replacement, the Starlink accessory costs $64 for a 75-foot cord or $93 for a 150-foot variant.
If you’re unable to identify the problem or resolve it on your own, it might be time to get in touch with Starlink. Keep in mind that there’s no simple phone number to dial. Instead, you’ll need to use the app or visit Starlink’s support page for assistance.
Problem 2: Starlink is slower than normal

Is your Starlink connection slowing down? You’re not alone if you’ve noticed a decline in your Starlink internet speed. Several factors can contribute to a slowdown, but the primary reason is oversubscription, meaning there are too many people using the service in your area. Unfortunately, this is a challenging issue to resolve. For those on the Residential (Standard) plan, one option is to upgrade to the Business tier, but this would cost $250 a month. Starlink Roam users can temporarily activate priority data, but it comes at a cost of $2 per GB, which can add up quickly.
Before you decide to give up or spend more money, it’s essential to confirm that network congestion is indeed the problem, as other Starlink plans may not significantly improve the situation. To do this, follow these steps:
- Open the Starlink app and click on Speed Test. The app will analyze your connection and report any issues it detects. If it’s during a peak usage period and no other problems are found, it will likely attribute the issue to traffic congestion.
- If it’s not during a peak usage period, try performing a reset. To reset the dish, go to Settings > Starlink > Slide to Restart. Additionally, restart the router by navigating to Settings > Router > Reboot Router.
If the problem persists despite these steps, it’s time to contact Starlink support. Various factors could be contributing to the issue, such as faulty hardware or temporary network problems.
Reaching out to Starlink support will help diagnose the specific cause of your slowdown and guide you toward a solution. There are many issues that could be behind the problem including faulty hardware or temporary network issues.
Problem 3: Starlink WiFi connection is completely unavailable

Can’t detect a Wi-Fi connection at all? Your router might be the culprit. Here are steps to troubleshoot the issue:
- Check for Power: First, ensure that your router has power. If you are using the official Starlink router, turn it upside down. A small white light should indicate that it’s powered on. If there’s no light, check the cables to ensure they are properly connected, and verify that the outlet (and any surge protector) are functioning correctly.
- No Power?: If there is no power coming from the outlet, try plugging the router into another outlet to rule out issues with the electrical connection. If the outlet and surge protector are working, and the cables are properly connected, the problem may be with the router itself, possibly a damaged cord. In this case, contacting customer service is advisable.
- Router Has Power But Isn’t Working: If the router has power but isn’t functioning correctly, attempt to restart it. Go to Settings > Router > Reboot Router. This simple step might resolve the issue. If the problem persists, you’ll need to reach out to customer service. Depending on the warranty status of your hardware, you may need to purchase a new router.
If you don’t want to wait for a new router, and you have an older Starlink router with an included Ethernet cable (or an adapter), try connecting your laptop directly to the router via Ethernet. If this setup allows your laptop to access the internet, you’ll have a temporary means of getting online until your new router arrives.
Frequently Asked Questions
How do I contact Starlink?
For customer service you’ll want to visit the official Starlink support page or reach out via the app.
Why is Starlink so slow?
The most likely reason Starlink is slow is because you are using it during peak hours. Regardless of your Starlink plan, those who use massive amounts of data may also see some intentional deprioritization over other Standard and Business users.
How long does Starlink take to connect?
After resetting your equipment it will typically take up to 15 minutes to restart. Sometimes this can be longer if the software has to automatically update first or if the network is having trouble establishing a connection.
What does a red light mean on your router?
A red light means the dish and router aren’t communicating. You’ll want to check that your cables are properly connected. If they are, try resetting. Otherwise, you may need to replace your cable, dish, router, or all three.
How many devices can connect to a Starlink router?
The short answer is more devices than you’ll likely own. The official answer is 128 devices simultaneously.
Is Starlink affected by the weather?
Yes, Starlink is affected by the weather, especially strong rain, and snowy conditions. Wind and other elements can also affect the connection, though typically to a lesser degree.